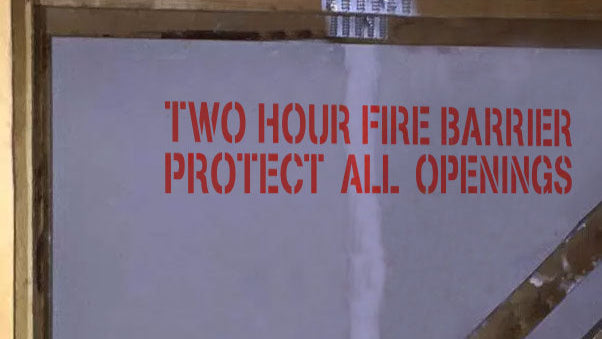
Two Hour Fire Barrier Protect All Openings Industrial Wall Stenciling
Posted by RANDY JAMES

Are you in need of a way to mark your Two Hour Fire Barriers? Look no further because you have come to the right place! Our “Two Hour Fire Barrier Protect All Openings” stencil complies with most fire codes and is reusable so that you may mark all of your fire barriers. Below are links to the products used in this tutorial.
Two Hour Fire Barrier Protect All Openings Stencil – https://bit.ly/2EQQH3c
Oneshot 3 inch Ink Roller – https://bit.ly/2F2GPnd
Oneshot Color Ink Cartridge Refill – https://bit.ly/2yHKSPZ
Repositionable Spray Adhesive – https://bit.ly/2OTuV3g
4 inch Foam Roller with Handle – https://bit.ly/2OWfKGB
Start by spraying the back of your stencil with Repositionable Spray Adhesive. Apply the Spray Adhesive from about 8-12 inches away on the back of your stencil. Wait 30-60 seconds for the adhesive to become tacky before pressing it to the surface of your wall or door. This stencil comes in 4″, 3″, & 2″ lettering.
You can use spray paint, a paint roller, or the one shot ink roller. Roll paint onto the roller before rolling it off onto a piece of paper towel. Do this so that you don’t spread too much paint onto the stencil. This can cause paint to bleed beneath the edges of design causing it to be blurry and unclear.
To use the ink roller, first you must screw the roller into the base of the cartridge. Hold the ink roller upside down and press the silver button 10-15 time then roll in one direction onto a scrap piece of paper. You may need to press the button several times before the ink comes out of the roller. Once you have an inked roller, you should only need to press the silver button a few times should you run out of ink. When ink starts coming out of the roller is won’t be coming out evenly so you’ll need to continue rolling until the ink evenly coats the roller and comes off smoothly.
Without applying any pressure, gently roll the ink roller over your stencil. Pass over each letter once on the first coat as you go around. Then apply a second coat. As you use the ink roller, give the ink about a minute to dry between coats to prevent the ink roller from rolling off any inked color. Touch up any weak spots and put the cover on your ink roller to keep it from drying out before the next use. Peel off the stencil and you’re ready to do your next repeat! To continue stenciling, simply press the stencil in it’s next spot and use the ink roller just as you did before.
